
Tags
Birthday Gift, Canvas Tote, Circle, Cricut, Cricut Design Space, Cricut Explore, Design Space Star, Farmers Market, Geometric, Gift Ideas, Housewarming Gift, Iron-On How To, Market Tote, Shopping Tote, To Market To Market
 A month ago I received an email from Cricut about Design Space Star, a design challenge. In short, between August and November there’s a monthly challenge to create an item using the Cricut Explore and there are prizes for the winners (!). After reading the email – and re-reading a few more times – I thought, “Why not try?” So I filled out the application, sent it off and waited to hear if I’d be selected… and promptly forgot about it thanks to our chaotic summer.
Fast forward a week or two later. I received an email letting me know I was chosen (gulp!). Next I received an email noting my team. I almost fell over. My team members are amazing; all are über talented ladies – you’ll meet them later, I promise. I really started to second guess what I had gotten myself into, but like any seemingly scary scenario, I dove right in.
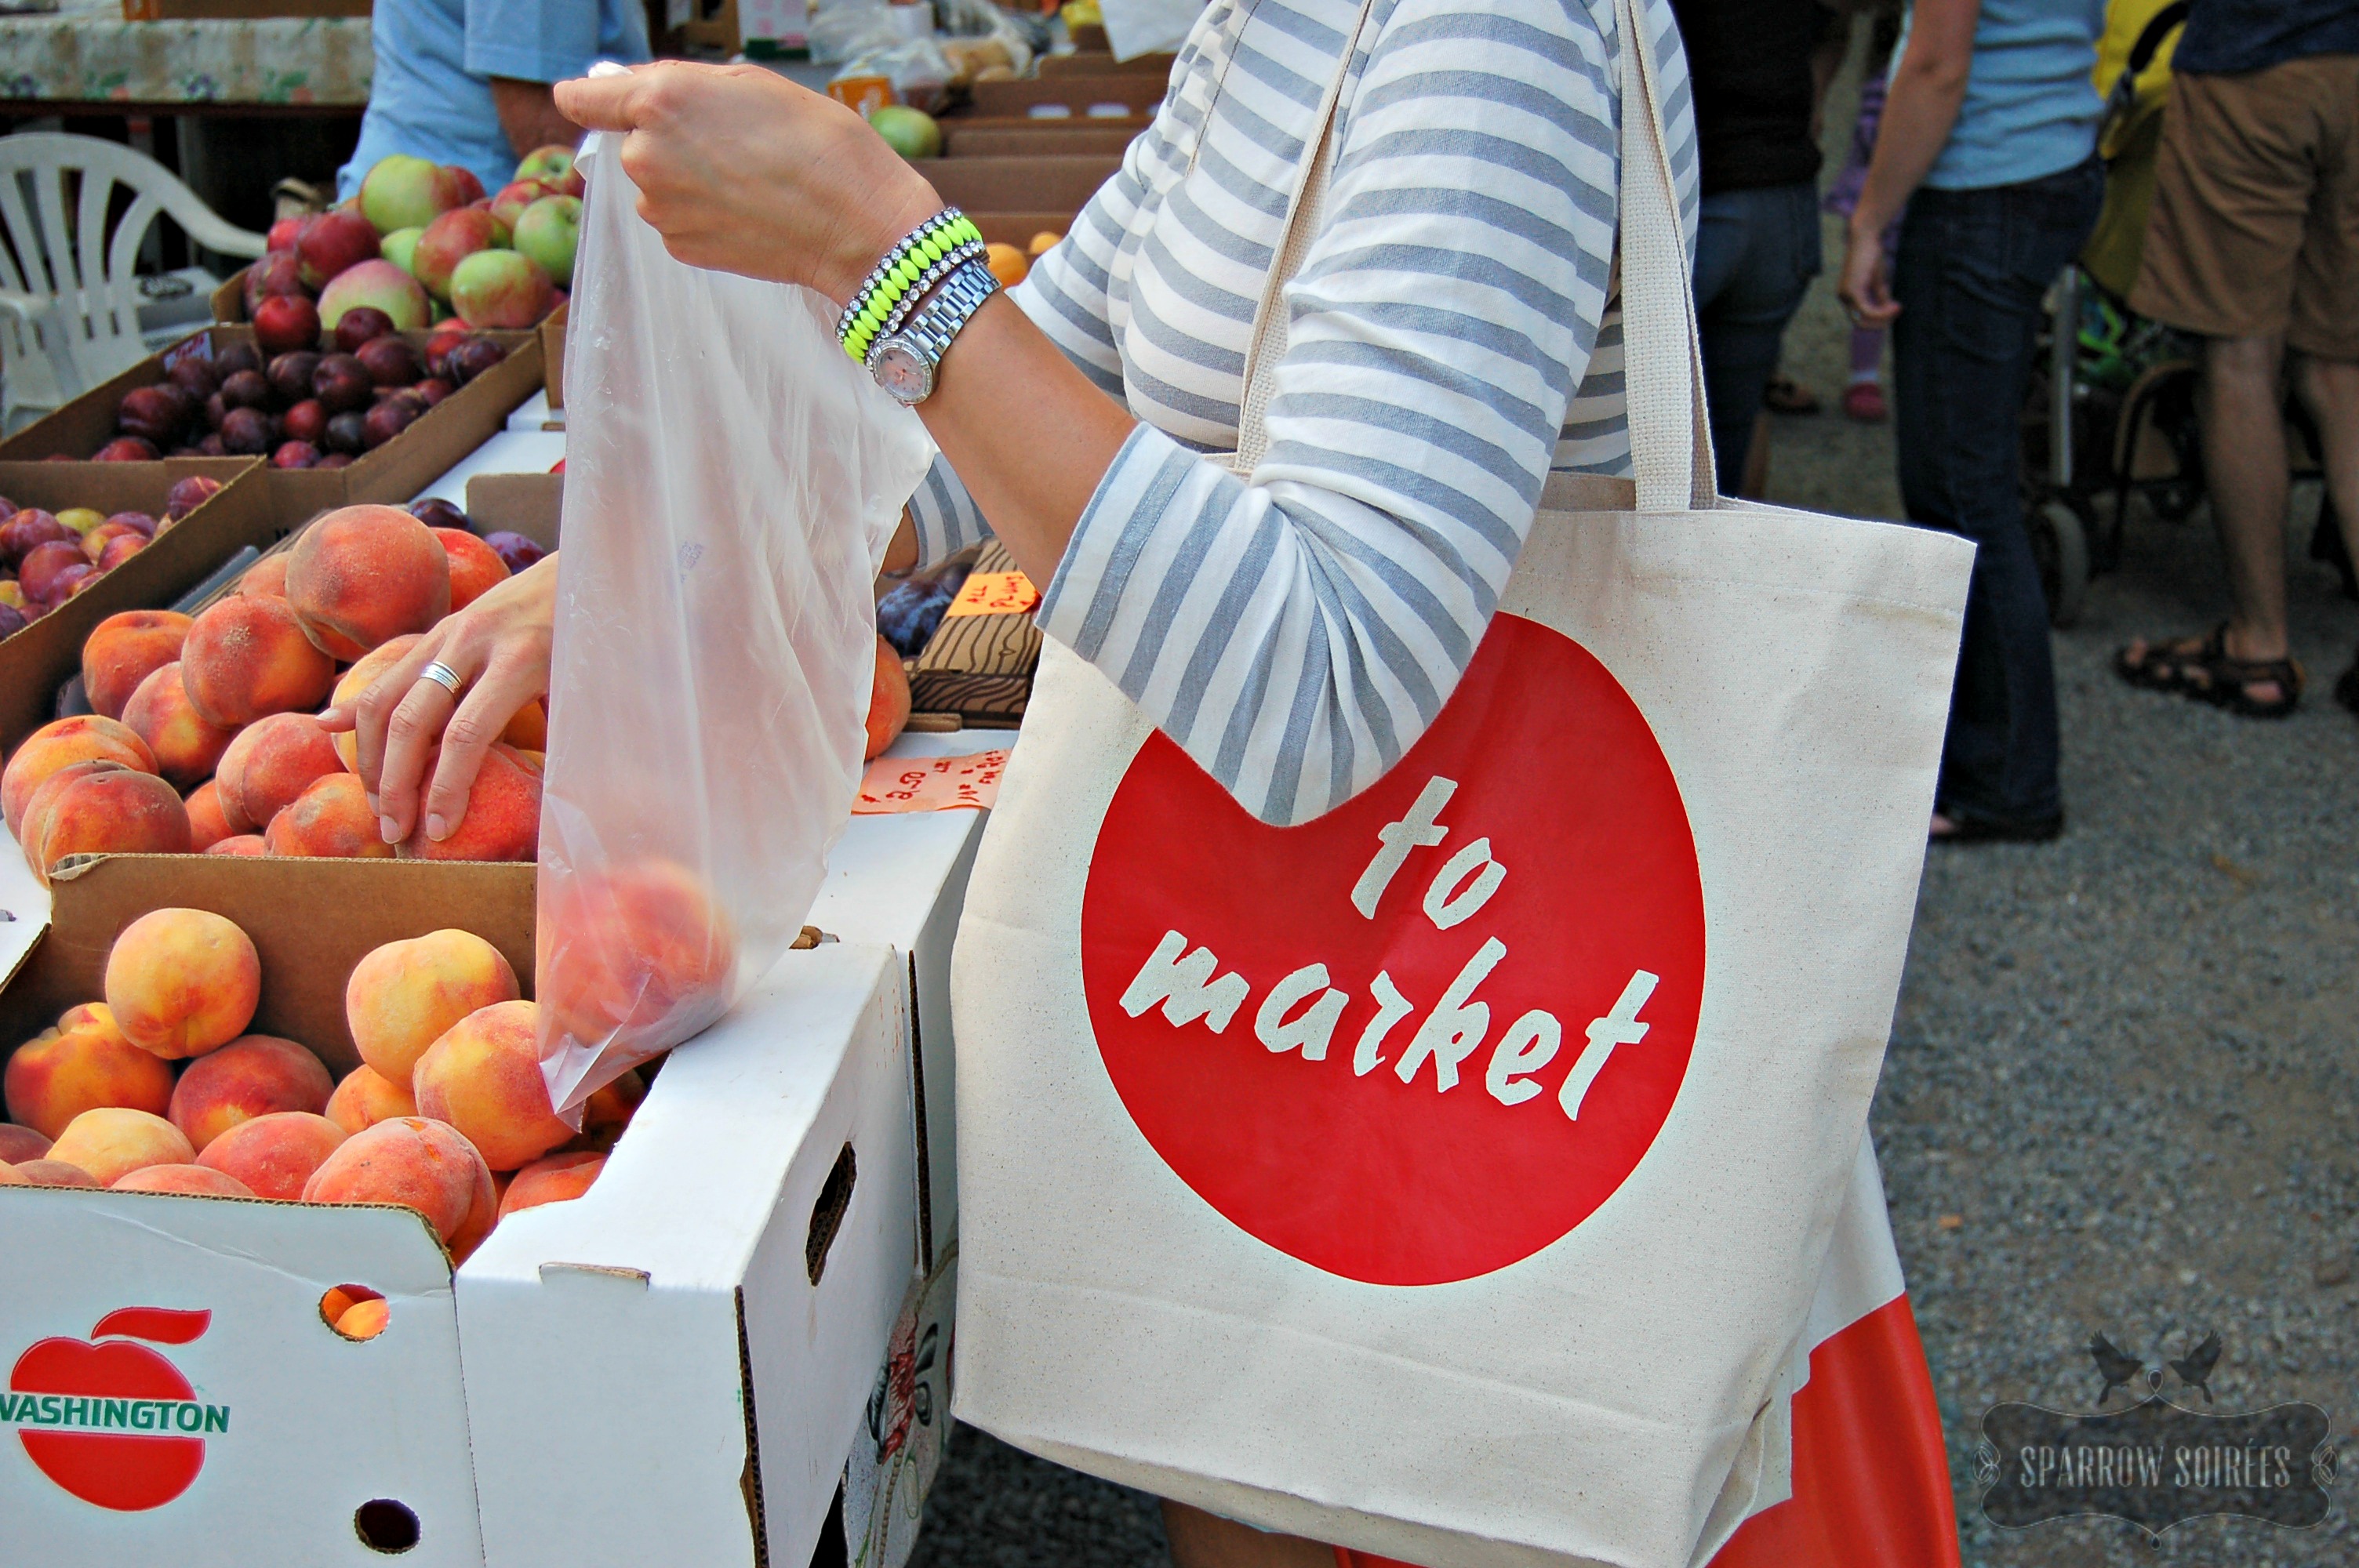
![]() Our first design challenge from Cricut was “fashion/gear.” As a team, we chose “geometric” as our central theme. After a little brainstorming and testing the waters, I decided to create a set of market bags.
Our first design challenge from Cricut was “fashion/gear.” As a team, we chose “geometric” as our central theme. After a little brainstorming and testing the waters, I decided to create a set of market bags.
Supplies:
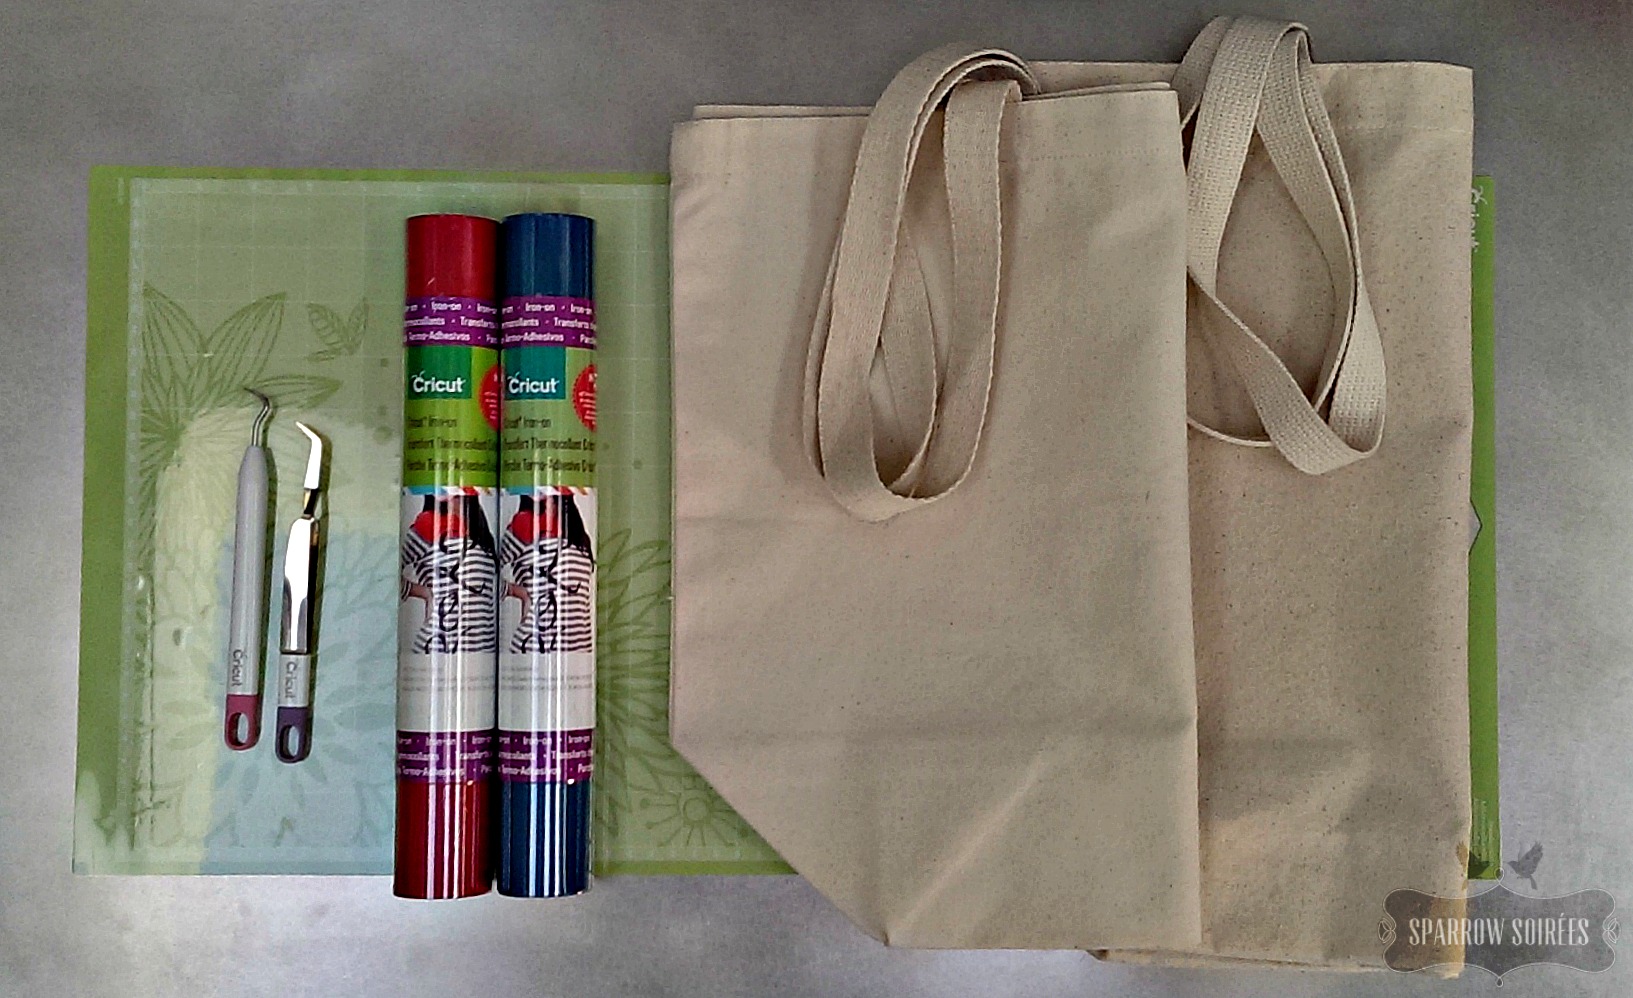 Speciality Items:
– 2 Canvas Market Totes
– 1 Cricut iron-on roll, red
– 1 Cricut iron-on roll, teal
– Cricut 12×24″ mat
– Cricut weeder & tweezer tools
Household Items:
– Scissors
– Iron
– Ironing board or thick bath towel
– Dish towel
If you have a Cricut Explore, click here for the design.
Design & Cut:
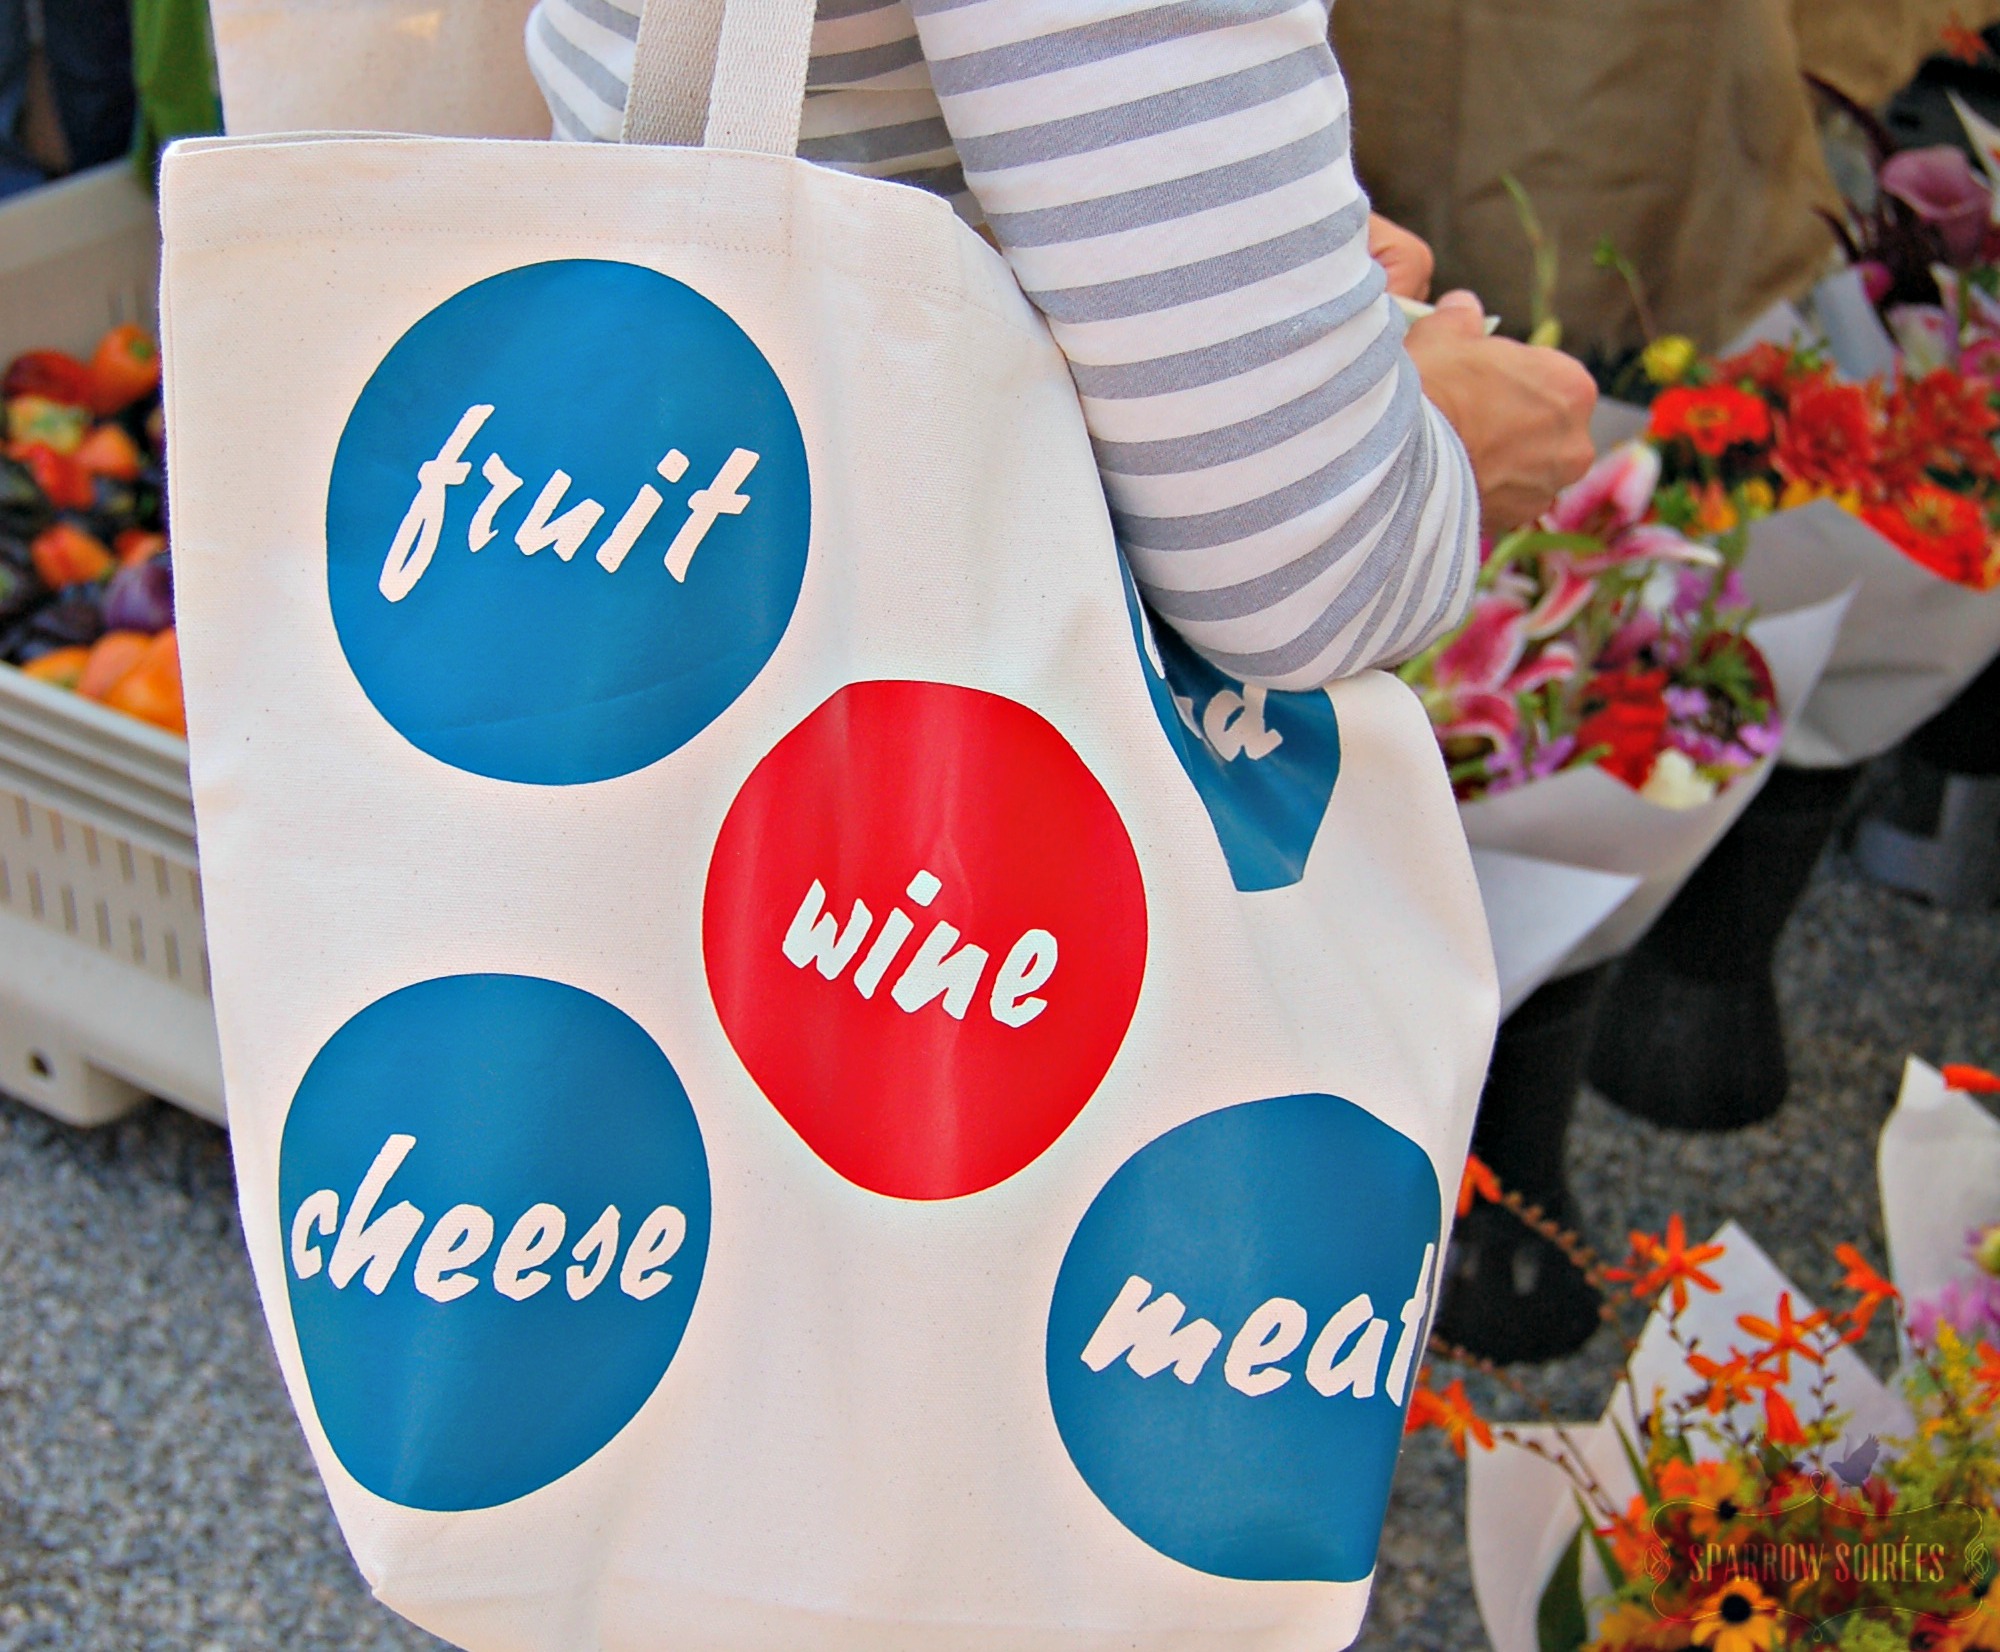
 Design: I wanted something simple yet polished. The “to market” circle felt like it hit the mark. For the second design, I wanted something fun but tied in. The five circles – cheese, bread, meat, fruit, and wine – are always perfect for a chic party spread and items you could grab at a market. (Just FYI: I’m not an Illustrator or Photoshop whiz. I created both designs in Cricut Design Space.)
Cut: Follow the directions carefully on the iron-on’s packaging. Cheat sheet: 1) stick the film, the really shiny side, to the mat so the iron-on’s dull side is facing you; 2) click the “mirror image” box in the Mat Preview window; 3) turn the Explore’s dial to “Iron-on” and automatically adjust the blade’s pressure for you. It will cut the iron-on while leaving the film intact. (I’m trying to figure out if it can make the morning coffee.)
Tips: 1) While in Cricut’s Design Space, I used their bag option in “set canvas,” which helped a lot. It simply outlines your item to give a general idea of the layout before cutting. 2) I double-check my design in “mat preview” to see how the design will be cut and how much material I’ll need. 3) When using pricier materials, I’ll cut the design on a light cardstock or butcher paper to ensure I’m pleased with the layout, sizing and so forth before the final cutting.
Prep & Assembly:
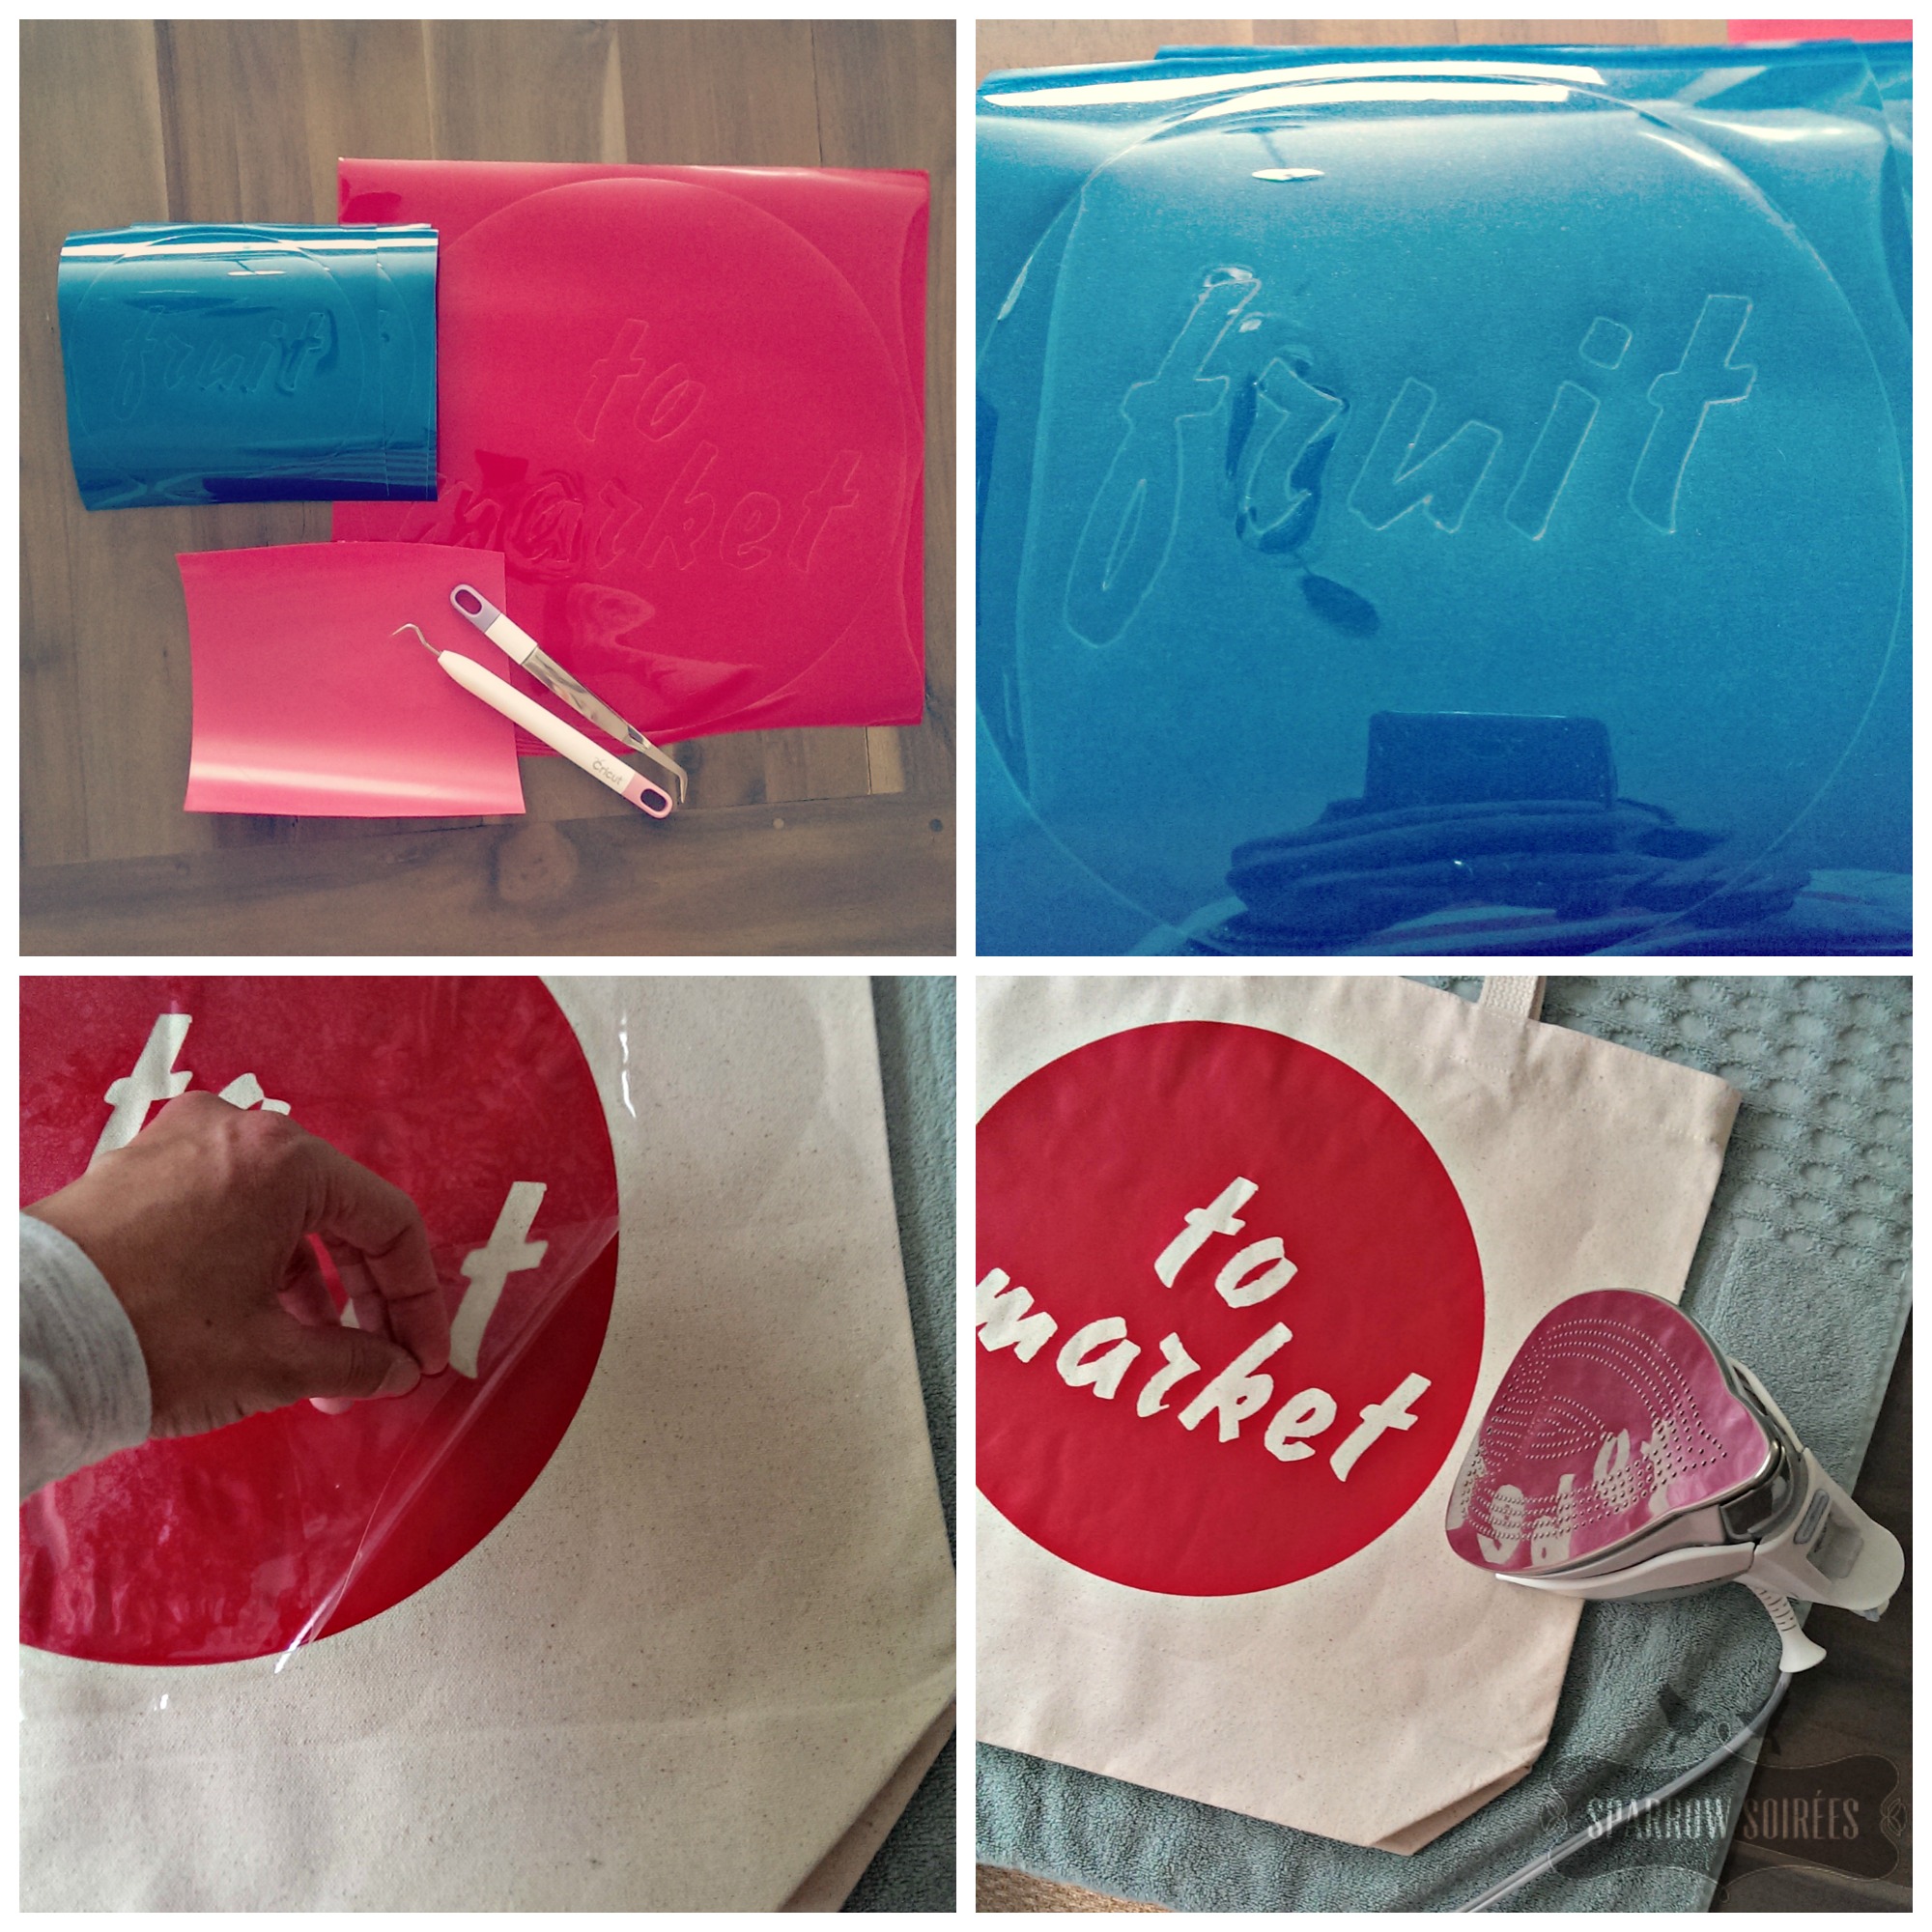 Prep: When peeling the iron-on off the mat, make sure to peel the shiny film with the iron-on since you’ll need it to protect your iron and design. With a pair of scissors, cut the excess negative space off. Find a corner of the iron-on material’s negative space (non-designed space), either using your fingernail or the Weeder tool, to pull off it off. For the smaller details, like the negative space in the “e” or “a”, I found working slowly, going between the tweezers and weeder as needed, worked wonders. Patience is key.
Assembly: Again, reading the directions on the iron-on label is key. Cheat sheet: 1) have everything prepped and ready for ironing; 2) warm up the material with the iron to help the film stick to the material; 3) quickly and carefully place your design before the material cools, pressing the design down a little as you go and cover with a dishtowel (I used a folded flour sack towel); 4) heat the design, moving methodically and pressing evenly; 5) flip the material over and heat from the backside. Once done, carefully pull up the film, checking the iron-on has properly adhered to the material.
Tips: 1) I used a thick bath towel on our dining table, which was easier than the ironing board due to the lower height. 2) The day after I finished the bags, I noticed a few bubbles under a couple of the iron-ons, which meant it wasn’t completely sealed. With the iron, I heated the backside of the design first. Then I re-ironed the design, using a sheet of parchment paper – to protect the design and iron until the bubbles disappeared – and used the same ironing technique when I first applied the design. 3) Cricut’s YouTube channel has a great, quick Iron-on 101 video worth watching if you’re new to the iron-on world like me. 4) If you cannot see a lined sheet through the material but need lines/a grid, use chalk and a ruler to create light lines. Test a discreet area first with the chalk and wipe it off with a baby wipe or damp towel to see if it will remove easily. 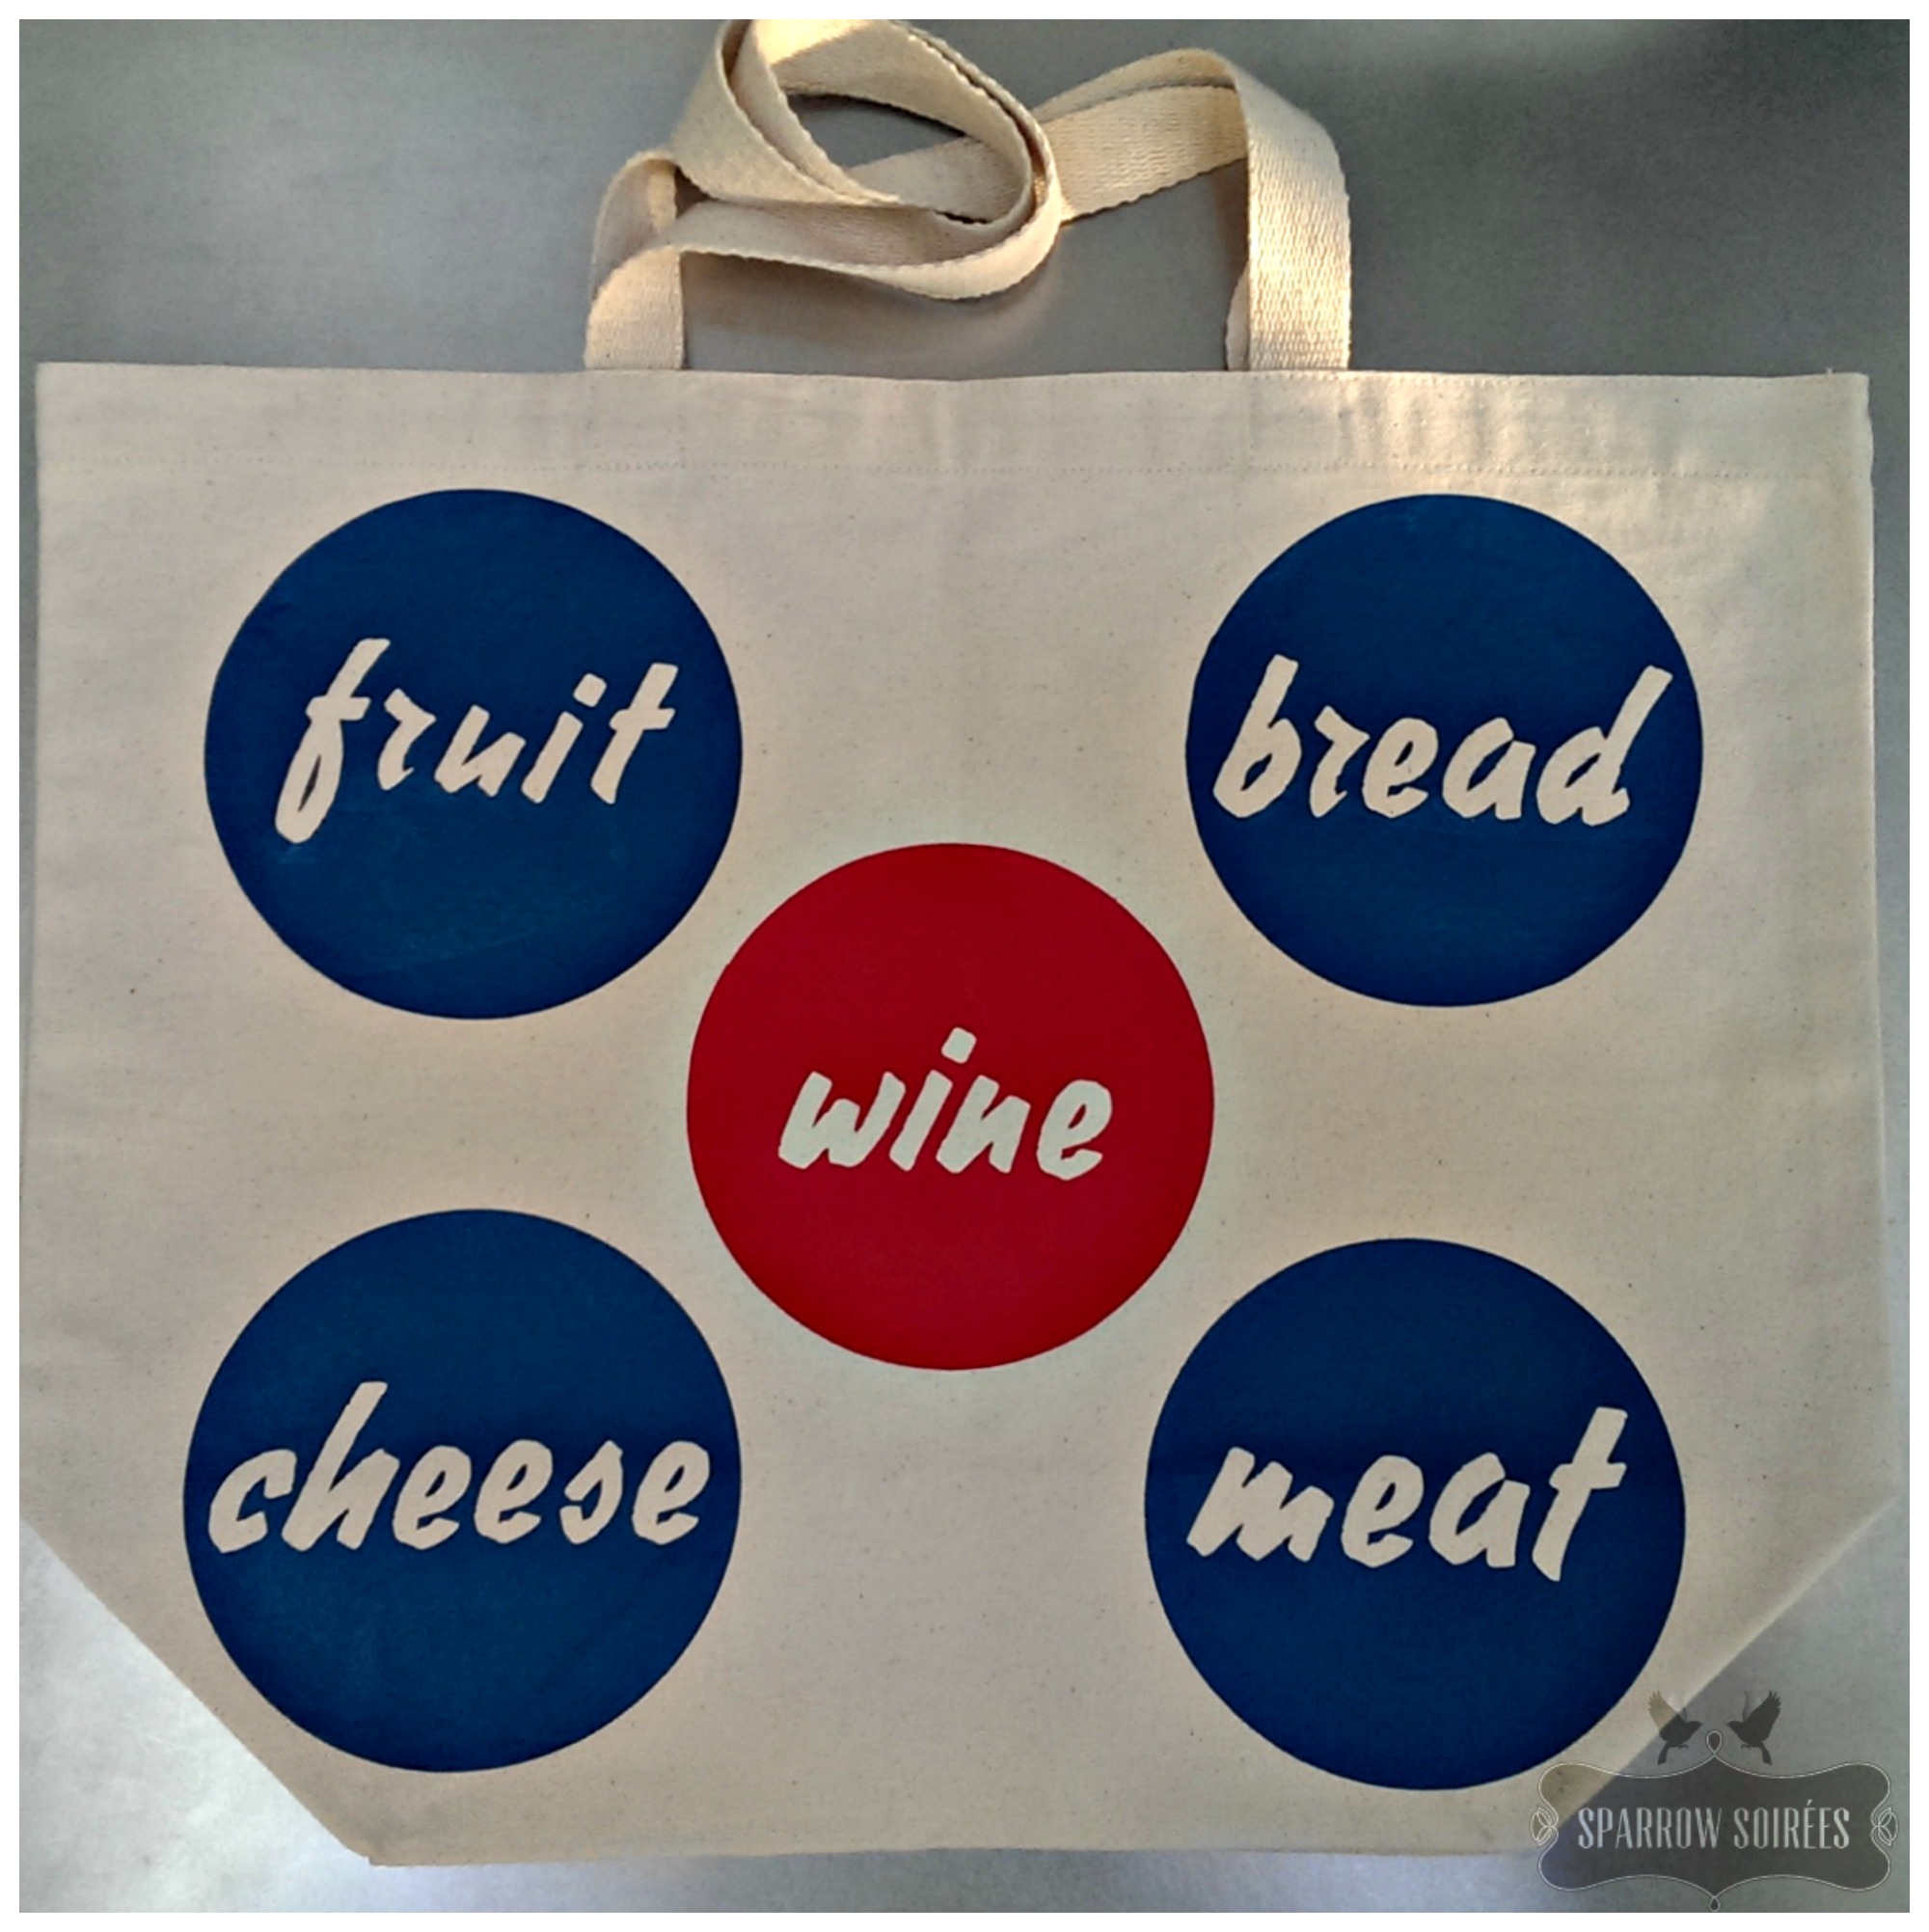
 I’m really pleased with these bags, especially since it was the first time I used iron-ons (I know; it’s crazy.). I think the set would make for a really great birthday, housewarming or teacher appreciation gift. Christmas is a must! By the way, add a personal touch if you’re giving these as gifts. Use a Sharpie to sign the inside of the bag with the date. All great creators should sign their work and the recipient will be all the more impressed.
 Soon there will be a chance for you, the fantastic readers, to vote for your favorite Design Space Star submissions. I’ll share the voting links once I have ’em in hand. In the meantime though, please pop over to the related Pinterest page and pin the tote design you like the best, leave a comment below or share this post on Facebook. I’d love to know your thoughts! Thank you so much!!
UPDATE: Guess what?! My bags were placed on the Cricut Design Space Star Pinterest board (yippee!)! If you happen to be a Pinterest user, please share the love by repinning the image. It would be greatly appreciated!
—Come hang out with this lil’ bird!
like sparrow | tweet with sparrow | sparrow’s pins | sparrow’s snaps

Pingback: An Endless Summer {monday’s remedy} | The Sparrow's Nest
Pingback: DIY Geometric Leather Earrings and Necklace - seven thirty three